Best Embroidery Machines for Beginners: 5 Easy Picks
Disclosure: As an Amazon Associate I earn from qualifying purchases. If you buy through links on this page, we may earn a small commission at no extra cost to you.
Buying your first embroidery machine can be confusing because beginner-friendly does not always mean cheapest. A machine that looks simple today can become frustrating if its embroidery area is too small, while a machine loaded with advanced features may add cost and complexity that a first-time user does not need.
For beginners, we think the most important questions are simpler: How easy is the machine to learn? What size designs can it handle? How are new designs transferred? Does it include sewing functions? And is there enough room to grow after the first few projects?
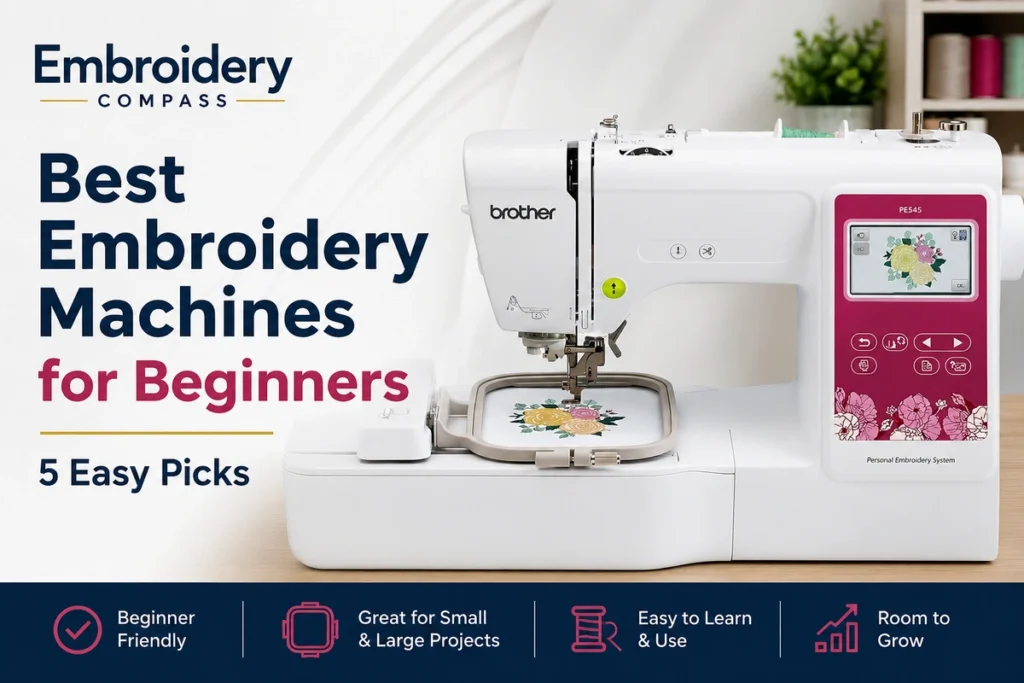
After comparing current beginner-oriented embroidery machines, our best embroidery machine for beginners is the Brother PE545. Its 4″ x 4″ embroidery field keeps early projects manageable, while wireless design transfer, a color touchscreen, automatic thread cutting and 135 built-in designs give new users plenty to explore.
It is not the only good starting point, however. The Brother SE700 is better if you also need sewing, the Brother Skitch PP1 takes a more app-centered approach, the Janome Memory Craft 100E offers a larger square embroidery field, and the Brother PE900 is our preferred choice for beginners who would rather buy more growing room from the start.
Best Embroidery Machines for Beginners at a Glance
| Embroidery Machine | Best For | Embroidery Area | Machine Type | Beginner Advantage |
|---|---|---|---|---|
| Brother PE545 | Best Overall for Beginners | 4″ x 4″ | Embroidery Only | Easy balance of features and simplicity |
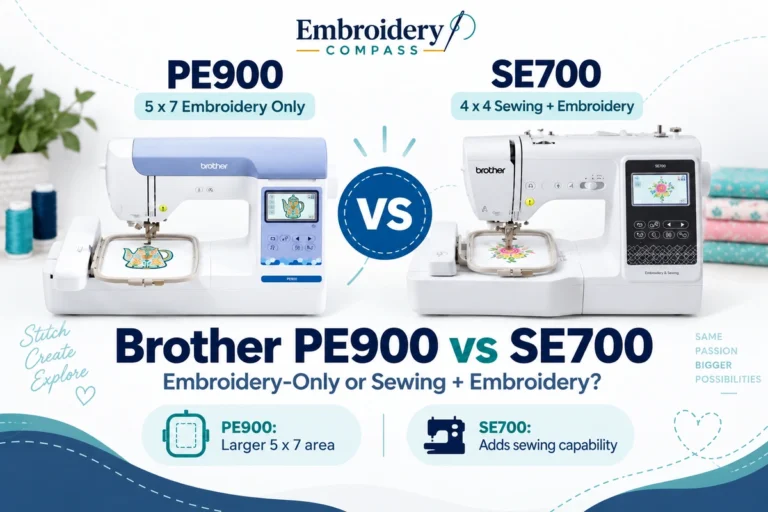
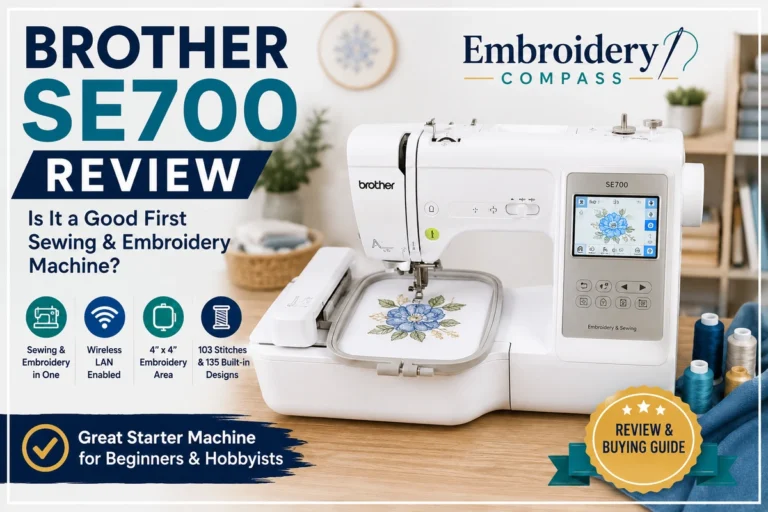
| Brother SE700 | Best Sewing + Embroidery Option | 4″ x 4″ | Sewing + Embroidery | Learn both crafts on one machine |
| Brother Skitch PP1 | Best App-Based Option | 4″ x 4″ | Embroidery Only | Magnetic hoop and Artspira workflow |
| Janome Memory Craft 100E | Best Non-Brother Alternative | 5.5″ x 5.5″ | Embroidery Only | Larger square field and touchscreen |
| Brother PE900 | Best Beginner Machine to Grow Into | 5″ x 7″ | Embroidery Only | More room for larger projects |
Notice that we did not simply rank these machines by price. For a first embroidery machine, usability and project fit matter more than buying the cheapest model available.
How We Evaluated Beginner Embroidery Machines
This guide focuses specifically on the needs of someone learning machine embroidery. That makes our evaluation different from our broader best embroidery machines guide, which also considers premium home machines and production-oriented equipment.
For a beginner, we gave extra weight to:
- Learning curve: The machine should make basic threading, hooping, design selection and starting a project understandable.
- Embroidery area: A beginner needs to know what can realistically fit inside the available field before purchasing designs.
- Screen and controls: Clear design positioning and editing can reduce confusion during early projects.
- Design transfer: USB, wireless and app-based options affect how easily downloaded embroidery files can be used.
- Automatic features: Needle threading and thread cutting can remove repetitive steps from the learning process.
- Sewing capability: Some beginners need embroidery only, while others want one machine for sewing and embroidery.
- Upgrade pressure: We considered how quickly a new embroiderer might outgrow the machine’s embroidery field or workflow.
Embroidery Compass bases these recommendations on manufacturer documentation, specifications, feature comparisons and practical buying considerations. We do not describe products as personally tested unless hands-on testing has actually taken place.
1. Brother PE545 — Best Overall Embroidery Machine for Beginners


Best for: First-time users who want to learn embroidery on a dedicated machine without paying immediately for a large embroidery field.
The Brother PE545 is our top beginner pick because its limitations are easy to understand and its useful features address many of the tasks a new embroiderer encounters during the first few months of learning.
It has a 4″ x 4″ maximum embroidery area, 135 built-in embroidery designs and 10 embroidery lettering fonts. The 3.7-inch color LCD lets you select, position and edit designs on the machine rather than relying entirely on external software.
Wireless LAN is especially useful once you move beyond the built-in library. Compatible embroidery files can be transferred from a computer using Brother’s Design Database Transfer software, while USB provides another way to bring designs into the machine.
Why the PE545 Stands Out for First-Time Users
Embroidery has several skills to learn before complicated designs should become the priority. A beginner needs to become comfortable with stabilizer, hooping, bobbins, needle selection, thread changes, fabric preparation and design placement.
The PE545 provides enough technology to make those tasks convenient without putting the user into a production-style environment with multiple needles or oversized hoops.
Its advanced needle-threading system and automatic thread cutter also reduce two small but repetitive tasks that can become frustrating when you are still learning the overall process.
What Can a Beginner Make With a 4″ x 4″ Machine?
A 4″ x 4″ embroidery area works well for learning projects such as:
- Names and initials
- Monograms
- Small decorative motifs
- Children’s clothing
- Small patches
- Napkins
- Small towel designs
- Simple gift personalization
- Small bag and pouch designs
These projects are large enough to teach important embroidery techniques without immediately requiring complicated positioning or oversized stabilizer.
Brother PE545 Key Features
- Maximum embroidery area: 4″ x 4″
- Built-in embroidery designs: 135
- Built-in embroidery fonts: 10
- Maximum embroidery speed: 400 SPM
- Display: 3.7-inch color LCD
- Wireless LAN: Yes
- USB design transfer: Yes
- Automatic thread cutter: Yes
- Advanced needle threading: Yes
- Built-in memory: Yes
Where Beginners May Outgrow It
The PE545’s biggest limitation is not its learning curve — it is its 4″ x 4″ embroidery field.
Once you begin browsing embroidery designs online, you will quickly encounter files created for 5″ x 7″ and larger hoops. A design larger than the machine’s usable embroidery field cannot simply be stitched at full size because you purchased a larger physical hoop.
That makes the PE545 ideal when you genuinely expect to work with smaller embroidery. If you already have larger shirt, bag or home-décor designs in mind, the PE900 may be a better first purchase despite its higher cost. For a direct feature-by-feature breakdown, see our Brother PE900 vs PE545 comparison.
Our verdict: Choose the PE545 when you want a dedicated embroidery machine that keeps the first learning experience manageable. Its 4″ x 4″ field is the tradeoff, but for small projects it provides a strong combination of screen controls, wireless transfer and beginner-friendly automation.
2. Brother SE700 — Best Sewing and Embroidery Machine for Beginners

Best for: Beginners who do not already own a sewing machine and want to learn sewing and embroidery with one machine.
The Brother SE700 solves a different beginner problem. Instead of buying a separate sewing machine and embroidery machine, it combines both functions in one relatively compact platform.
For embroidery, the SE700 provides a 4″ x 4″ maximum embroidery area, 135 built-in embroidery designs and 10 embroidery fonts. For conventional sewing, it adds 103 built-in sewing stitches and 10 styles of one-step auto-size buttonholes.
That combination makes sense for someone who wants to sew a pouch, garment or home project and then add embroidery without moving the work to a separate machine.
Why the SE700 Is Different From the PE545
The PE545 and SE700 share several beginner-oriented embroidery characteristics, including a 4″ x 4″ maximum field, 135 built-in embroidery designs and wireless connectivity.
The important difference is what happens when you are not embroidering.
The PE545 is a dedicated embroidery machine. The SE700 can perform conventional sewing as well. Brother includes several presser feet for sewing tasks, and the machine can sew at speeds up to 710 stitches per minute.
For someone who already owns a good sewing machine, that extra functionality may be unnecessary. For a beginner starting a craft room from scratch, however, it can reduce the number of machines that need to be purchased immediately.
Beginner-Friendly Design Transfer
The SE700 supports wireless LAN and Brother’s Design Database Transfer system, allowing compatible embroidery files to be sent from a computer without relying solely on a USB drive.
It is also compatible with Brother’s Artspira ecosystem, which gives beginners another way to explore designs and create simple projects from a mobile device.
Brother SE700 Key Features
- Machine type: Sewing + embroidery
- Maximum embroidery area: 4″ x 4″
- Built-in embroidery designs: 135
- Embroidery fonts: 10
- Built-in sewing stitches: 103
- One-step buttonhole styles: 10
- Maximum sewing speed: 710 SPM
- Wireless LAN: Yes
- Automatic thread cutter: Yes
- Advanced needle threading: Yes
What Beginners Should Consider
A combination machine does more, but that also means there is more to learn. Someone interested only in embroidery may prefer the more focused experience of the PE545 or PE900.
The other limitation is again the 4″ x 4″ embroidery field. The SE700’s sewing capability does not change the size of embroidery designs it can stitch in one embroidery area.
Our verdict: The SE700 is our favorite beginner option for someone who needs both sewing and embroidery. If embroidery is your only goal, choose a dedicated embroidery machine instead.
3. Brother Skitch PP1 — Best App-Based Embroidery Machine for Beginners

Best for: Beginners who prefer controlling projects through a mobile app and like the convenience of a magnetic hoop.
The Brother Skitch PP1 takes a noticeably different approach to beginner embroidery. Rather than behaving like a traditional embroidery machine with a feature-heavy onboard interface, Skitch is built around Brother’s Artspira mobile app.
It has a 4″ x 4″ maximum embroidery area and runs at up to 400 stitches per minute, placing its project size in the same general beginner class as the PE545. The experience of using it, however, is quite different.
Why the Magnetic Hoop Is Interesting for Beginners
Traditional embroidery hoops hold fabric between an inner and outer frame. Learning how tightly to hoop fabric and stabilizer is an important embroidery skill, but it is also one of the first areas where beginners can become frustrated.
Skitch includes a 4″ x 4″ magnetic frame. For suitable projects, the magnetic approach can make positioning and repositioning material more convenient than repeatedly forcing fabric into a conventional hoop.
This can be especially appealing for small personalization projects where quick placement matters more than having a large embroidery field.
Artspira Is Central to the Skitch Experience
This is the most important point to understand before choosing the PP1: Artspira is required to use Skitch.
The free Artspira Standard option can be used with the machine, so a paid Artspira+ subscription is not required simply to operate it. The app handles design transfer and provides access to design and drawing functionality.
For someone comfortable using a phone or tablet as part of the embroidery workflow, that may feel intuitive. For a buyer who prefers controlling everything directly from the machine itself, the PE545 or Janome 100E is likely a better fit.
Brother Skitch PP1 Key Features
- Machine type: Embroidery only
- Needles: 1
- Maximum embroidery area: 4″ x 4″
- Maximum embroidery speed: 400 SPM
- Included hoop: 4″ x 4″ magnetic frame
- Artspira connection: Required
- Free Artspira option available: Yes
- Wireless enabled: Yes
- Automatic thread cutter: Yes
- Upper and bobbin thread sensors: Yes
Who Should Avoid the Skitch PP1?
We would skip Skitch if you dislike app-dependent products or want a larger embroidery area from the beginning. Its 4″ x 4″ limit is still a real project-size limitation even though its workflow feels different from other entry-level machines.
It also may not be the best choice if you specifically want to learn embroidery through a more conventional machine interface before exploring mobile design tools.
Our verdict: Skitch is one of the most distinctive beginner machines in this comparison. Choose it because you specifically like its app-centered workflow and magnetic hoop, not simply because it is compact.
4. Janome Memory Craft 100E — Best Non-Brother Embroidery Machine for Beginners
Best for: Beginners who want a dedicated embroidery machine with more working area than a typical 4″ x 4″ starter model.
The Janome Memory Craft 100E gives this guide an important alternative to Brother’s beginner lineup. Its standout specification for a new embroiderer is a 5.5″ x 5.5″ maximum embroidery area.
That square field gives you more usable design space than a 4″ x 4″ machine while keeping the overall embroidery platform relatively compact.
Janome includes 274 built-in embroidery designs, 11+ embroidery fonts and a 3.5-inch color touchscreen. The machine can stitch at speeds from approximately 400 to 660 stitches per minute and includes on-screen functions for resizing, rotating, combining, duplicating and flipping designs.
Why the 5.5″ x 5.5″ Field Is Useful
A first-time buyer often thinks only about today’s projects. The better question is what you might want to embroider after you have completed twenty or thirty projects.
The Janome’s 5.5″ square field provides more room than the PE545, SE700 or Skitch PP1. That does not automatically make it better, but it reduces some of the design-size pressure that comes with starting at 4″ x 4″.
It can therefore suit someone who wants a beginner-accessible embroidery-only machine but already suspects that small monograms will not be the end of the hobby.
Traditional USB Design Transfer
The Memory Craft 100E uses USB for external design transfer rather than emphasizing the wireless ecosystem found on several Brother machines.
That can be viewed in two ways. Wireless transfer is more convenient when you frequently move designs from a computer or mobile ecosystem. On the other hand, some beginners prefer the straightforward process of putting a compatible embroidery file on a USB drive and inserting it directly into the machine.
Janome Memory Craft 100E Key Features
- Machine type: Embroidery only
- Maximum embroidery area: 5.5″ x 5.5″
- Built-in embroidery designs: 274
- Embroidery fonts: 11+
- Maximum embroidery speed: 660 SPM
- Display: 3.5-inch color touchscreen
- Design transfer: USB
- Automatic jump-thread cutting: Yes
- Automatic thread cutter: Yes
- On-screen design editing: Yes
- Built-in memory: Up to 2.5 MB
What Beginners Should Consider
The Janome does not provide the same wireless design-transfer experience as the PE545 and PE900, so buyers who strongly prefer sending designs wirelessly may lean toward Brother.
It may also represent more machine than someone needs for occasional 4″ x 4″ monograms. Its value is strongest for a beginner who specifically wants additional embroidery area and a dedicated embroidery platform.
Our verdict: The Memory Craft 100E is our preferred non-Brother alternative for beginners. Its 5.5″ x 5.5″ field gives it a meaningful advantage over small 4″ x 4″ starter machines when project size matters.
5. Brother PE900 — Best Beginner Embroidery Machine to Grow Into
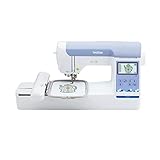
Best for: Beginners who are confident they will continue embroidery and want to avoid starting with a restrictive 4″ x 4″ field.
The Brother PE900 is not our simplest beginner machine. Instead, it is the machine we would consider when a first-time buyer already knows that embroidery is likely to become a serious hobby.
Its main advantage is straightforward: a 5″ x 7″ maximum embroidery area. That additional space changes the range of designs you can consider and reduces the chance that 4″ x 4″ becomes an immediate limitation.
The PE900 also provides 193 built-in embroidery designs, 13 embroidery fonts, wireless connectivity, USB transfer and embroidery speeds up to 650 stitches per minute.
Why a Beginner Might Skip 4″ x 4″
A 4″ x 4″ machine is a perfectly reasonable learning tool, but not every beginner needs to start there.
If you have already spent time browsing embroidery designs and repeatedly find yourself attracted to 5″ x 7″ projects, buying a smaller machine first can create an unnecessary upgrade cycle.
That is why we view the PE900 as the buy once with more growing room option in this beginner guide rather than simply calling it a more expensive PE545.
Useful Features After the Beginner Stage
The PE900 includes features that become more useful as designs become more complicated. Color Sort can help organize compatible multi-color embroidery sequences to reduce unnecessary color changes, while Jump Stitch Trimming can reduce some of the manual cleanup between design elements.
A beginner may not choose the machine specifically because of those features, but they become more valuable after basic threading and hooping are no longer the main challenges.
Brother PE900 Key Features
- Machine type: Embroidery only
- Maximum embroidery area: 5″ x 7″
- Built-in embroidery designs: 193
- Built-in embroidery fonts: 13
- Maximum embroidery speed: 650 SPM
- Display: 3.7-inch color LCD
- Wireless LAN: Yes
- USB transfer: Yes
- Automatic thread cutter: Yes
- Color Sort: Yes
- Jump Stitch Trimming: Yes
When the PE900 Is Too Much for a First Machine
If you are still unsure whether embroidery will become a lasting hobby and only expect to personalize small items occasionally, paying more for a 5″ x 7″ platform may not be necessary.
The PE900 is also embroidery only. Someone who needs to learn conventional sewing at the same time should look at the SE700 instead.
Our verdict: Choose the PE900 as your first machine when you already know that 4″ x 4″ will probably feel restrictive. It costs more than a basic beginner model, but the larger embroidery field provides considerably more room for your skills and projects to develop.
Brother PE545 vs SE700 vs Skitch PP1 for Beginners
These three Brother machines can all make sense for a beginner, but they should not be treated as interchangeable.
| Model | Choose It When… | Main Tradeoff |
|---|---|---|
| PE545 | You want a conventional dedicated beginner embroidery machine | 4″ x 4″ field |
| SE700 | You need sewing and embroidery in one machine | More functions to learn |
| Skitch PP1 | You like an app-based workflow and magnetic hoop | Artspira is required |
For embroidery alone, we prefer the PE545 for the average beginner. The SE700 becomes more attractive when sewing is genuinely needed, while Skitch should be chosen by someone who specifically prefers its app-driven approach.
4″ x 4″ vs 5.5″ x 5.5″ vs 5″ x 7″: What Should a Beginner Buy?
Hoop size is one of the most important decisions in your first embroidery-machine purchase because it places a physical limit on the design area the machine can embroider in one field.
Choose 4″ x 4″ if:
- You mainly want monograms and names
- You want to learn with smaller projects
- You have a tighter machine budget
- You are unsure how serious the hobby will become
- You prefer a smaller starting point over paying for unused capacity
Choose 5.5″ x 5.5″ if:
- You like the square working area of the Janome 100E
- You want more room than a typical starter machine
- You prefer USB transfer over an app-dependent workflow
- You want a dedicated embroidery machine from a non-Brother brand
Choose 5″ x 7″ if:
- You already know you want medium-sized designs
- You expect embroidery to become a long-term hobby
- You frequently find 5″ x 7″ designs you want to purchase
- You would rather spend more initially than upgrade from 4″ x 4″ soon afterward
There is no rule that says every beginner must start with the smallest hoop. The best choice is the smallest machine that still fits the projects you realistically expect to make.
What Should a Beginner Look for in an Embroidery Machine?
1. A Manageable Learning Curve
Your first machine should help you understand embroidery fundamentals rather than hide them behind unnecessary complexity.
You will need to learn how stabilizer supports fabric, why hoop tension matters, how bobbin thread affects stitching, how different embroidery needles behave and how designs are positioned before stitching begins.
Features such as automatic needle threading and thread cutting are useful because they save time without preventing you from learning those core techniques.
2. Enough Embroidery Area for Your Real Projects
Do not buy a 4″ x 4″ machine solely because it is described as beginner-friendly if all the designs you actually want to make require a larger field.
Before buying, spend some time browsing the types of embroidery designs you like and note their common dimensions. This simple research can tell you more about the right hoop size than a list of built-in machine features.
3. An Easy Way to Import Designs
Built-in designs are enough for initial practice, but most embroiderers eventually want designs from outside the machine.
The machines in this guide use different approaches:
- PE545: Wireless and USB
- SE700: Wireless design transfer and Brother ecosystem support
- Skitch PP1: Artspira-centered workflow
- Janome 100E: USB
- PE900: Wireless and USB
Choose the workflow that feels natural to you rather than assuming wireless is always essential.
4. A Clear Screen or App Interface
Being able to preview, move, resize or otherwise inspect a design before stitching can reduce placement mistakes.
The PE545 and PE900 use 3.7-inch color displays, while Janome gives the 100E a 3.5-inch color touchscreen. Skitch moves more of the workflow to Artspira instead of relying on a traditional onboard editing experience.
5. Support for Skills You Want to Learn Next
Consider what comes after your first monogram.
If you expect to learn sewing too, the SE700 has a clear advantage. If larger embroidery is your goal, PE900 or Janome 100E may make more sense. If mobile creativity appeals to you, Skitch provides a different route into the craft.
What Do You Need to Start Machine Embroidery?
Buying the machine is only the first part of the setup. A beginner should have basic supplies ready before starting the first project.
- Machine embroidery thread
- Embroidery bobbin thread or pre-wound bobbins
- Appropriate embroidery needles
- Cut-away stabilizer
- Tear-away stabilizer
- Wash-away stabilizer for suitable projects
- Fabric for practice
- Small thread scissors
- Seam ripper
- Extra bobbins
The correct stabilizer depends on both the fabric and the design, so buying one stabilizer and expecting it to work for every project is a common beginner mistake.
Explore our embroidery supplies and accessories guides for help choosing thread, needles, stabilizers, hoops and other essentials.
5 Mistakes to Avoid When Buying Your First Embroidery Machine
1. Choosing Only by Price
The least expensive machine is not automatically the best beginner machine. If its hoop size prevents you from making the projects that attracted you to embroidery, the lower initial price may simply lead to an earlier upgrade.
2. Confusing Hoop Size With Unlimited Design Size
An optional physical hoop does not automatically increase the machine’s maximum embroidery field. Always check the machine’s stated maximum embroidery area before purchasing designs or accessories.
3. Ignoring Embroidery File Compatibility
Embroidery files are not the same as ordinary JPG or PNG images. Machines work with embroidery formats that contain stitch information. Make sure downloaded designs are available in a format compatible with your machine and are sized appropriately for its embroidery field.
If you eventually want to create or substantially edit your own stitch files, visit our embroidery software guides to understand the difference between basic editing and full digitizing software.
4. Buying Too Many Accessories Before Learning the Machine
You do not need every optional hoop, thread set and specialty accessory on day one. Start with a few simple projects, learn which materials you enjoy embroidering and then add accessories based on actual needs.
5. Starting With an Overly Complicated Project
Your first project does not need thousands of stitches and ten thread colors. A simple design on stable woven fabric makes it easier to understand hooping, stabilizer, thread changes and placement before adding more variables.
Browse our embroidery how-to guides as you begin learning setup, hooping, stabilizers, design files and troubleshooting.
Which Beginner Embroidery Machine Should You Buy?
If you are still deciding, match the machine to your situation rather than comparing every specification again.
Choose the Brother PE545 if:
You want a straightforward dedicated embroidery machine for learning small projects and do not expect a 4″ x 4″ field to be restrictive.
Choose the Brother SE700 if:
You need to learn conventional sewing and embroidery and would rather own one combination machine than buy two separate machines immediately.
Choose the Brother Skitch PP1 if:
You like using mobile apps, want a magnetic hoop and specifically prefer an Artspira-centered embroidery workflow.
Choose the Janome Memory Craft 100E if:
You want a non-Brother embroidery-only machine with a larger 5.5″ x 5.5″ field, touchscreen editing and traditional USB design transfer.
Choose the Brother PE900 if:
You are new to machine embroidery but already know that you want a 5″ x 7″ field and would rather buy more growing room from the beginning.
Frequently Asked Questions
What is the easiest embroidery machine to use for beginners?
For most first-time users, we recommend the Brother PE545. It combines a manageable 4″ x 4″ embroidery field with a color LCD, wireless connectivity, built-in designs, automatic thread cutting and an advanced needle-threading system.
The easiest machine still depends on your preferred workflow. Someone comfortable working primarily through a mobile app may find the Brother Skitch PP1 more intuitive.
Should a beginner buy a 4″ x 4″ or 5″ x 7″ embroidery machine?
A 4″ x 4″ machine is suitable for learning monograms, names, small patches and many basic projects. A 5″ x 7″ machine provides substantially more flexibility for medium-sized designs.
If you are unsure whether embroidery will become a long-term hobby, 4″ x 4″ can be a reasonable starting point. If you already know you want larger projects, buying 5″ x 7″ initially may reduce the need to upgrade later.
Is the Brother PE545 good for a complete beginner?
Yes. The PE545 is specifically well suited to first-time embroidery users because it offers a manageable embroidery area, built-in designs, on-screen editing, wireless design transfer and several automatic features without adding conventional sewing functions that an embroidery-only buyer may not need.
Is the Brother PE900 too advanced for a beginner?
No. A beginner can learn on the PE900. The reason we do not rank it as our simplest beginner choice is primarily cost and need rather than difficulty.
If you already know you want a 5″ x 7″ embroidery field, starting with the PE900 can make more sense than buying a smaller machine and upgrading shortly afterward.
Should a beginner buy an embroidery-only or combination machine?
Buy an embroidery-only machine if you already have a sewing machine or have little interest in conventional sewing. Buy a sewing-and-embroidery combination machine if you genuinely expect to use both functions and prefer one machine instead of two.
In this guide, the Brother SE700 is our combination-machine recommendation for beginners.
Do beginners need embroidery software?
No. Beginners can start with the machine’s built-in designs and compatible embroidery files without purchasing professional digitizing software.
Software becomes more important when you want to create your own designs, substantially edit existing designs or convert artwork and logos into stitch files.
Can a beginner make items to sell?
Yes. A beginner can learn on a home embroidery machine and eventually sell suitable personalized items. However, it is better to become consistent with hooping, stabilizer selection, thread tension, design placement and finishing before taking paid orders.
If order volume later becomes substantial, you can evaluate whether a larger or multi-needle machine would improve productivity.
Final Verdict
The best beginner embroidery machine is not necessarily the machine with the fewest features. It is the machine that lets you learn comfortably while still fitting the projects that motivated you to start embroidery.
The Brother SE700 is our preferred option when sewing and embroidery need to share one machine. The Brother Skitch PP1 stands out for beginners who want an app-centered experience and magnetic hoop, while the Janome Memory Craft 100E provides an attractive non-Brother alternative with a larger 5.5″ x 5.5″ embroidery field.
Beginners who already know they want medium-sized embroidery should consider the Brother PE900. Its 5″ x 7″ field gives considerably more room to grow than a basic starter machine.
For the typical first-time buyer, however, our best overall beginner embroidery machine is the Brother PE545. Its combination of a manageable 4″ x 4″ field, color display, wireless design transfer, built-in designs and convenient automatic features provides a practical environment for learning the fundamentals of machine embroidery.